

In this section we'll go over adding a user to the Local Administrators Group on Intune Joined Windows systems. Later we'll use LAPS to manage the password for this user.
First, lets create the script required to perform this action:
# Enter a unique name for the $userName Variable #>
$userName = "***"
$Userexist = (Get-LocalUser).Name -Contains $userName
if ($userexist) {
Write-Host "$userName exist"
Exit 0
}
Else {
Write-Host "$userName does not Exists"
Exit 1
}
Use this code - Don't forget to change the *** to a username of your liking - and save it as a ps1 file. You will need the name of this account for the LAPS portion of this tutorial
Next, you'll need to be logged into the Intune Portal with credentials required to perform this action.
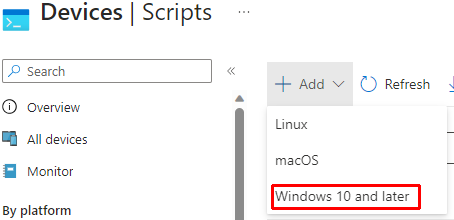
Select Devices then select Scripts, then Select Add and then finally Windows 10 and Later
Give your script a unique name that properly describes its action. On the Script Settings tab, Upload the ps1 file we made previously to the Script Location, then match your settings to the image below:
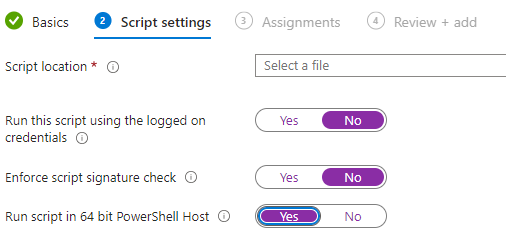
The next tab will be to assign the script to the appropriate group., then Review and Add the script and we're all set!
This will add a local user to the computer.
Note: This does not create a password for the user. In later steps, we'll use LAPS to manage the password for this user. You can read more about
LAPS here:
https://learn.microsoft.com/en-us/windows-server/identity/laps/laps-overview
Next, we'll ensure the user is part of the Administrators group.
Ensure you're connected to https://endpoint.microsoft.com with the appropriate credentials to complete this task. The navigate to:
Endpoint Security then under Manage on the left, select Account Protection
From there we'll be selecting Create Policy
Ensure your settings are as follows:
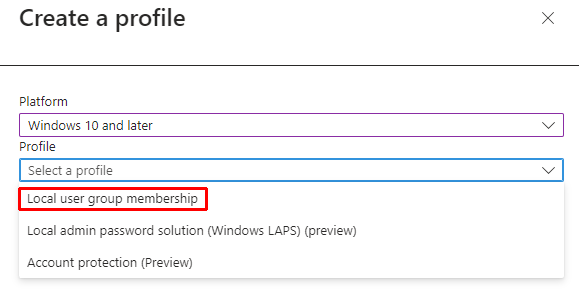
Platform: Windows 10 and Later
Profile: Local User Group Membership
- Don't get ahead of yourself here. We need to add the account as an Administrator before adding LAPS to manage the account.
The next step will ask you to provide a name for your new policy, and a description if you wish. The next window is the important one.

You can tab through the Tags settings as they are not required. Ensure you assign this policy to the correct Device or user then carry on. Feel free to read and understand the next few settings and determine if you wish to change anything. In this case, we can simply create our new Policy once we've assigned it correctly.
Congratulations! You now has a user, that is part of the Local Administrators Group! But hold on, we still don't have a password for this user. This is very imporant. Next, we'll cover configuring LAPS to manage the password for this user.

As with the previous step, ensure you're connected to https://endpoint.microsoft.com with the appropriate credentials to complete this task. The navigate to:
Endpoint Security then under Manage on the left, select Account Protection
From there we'll be selecting Create Policy
Ensure your settings are as follows:
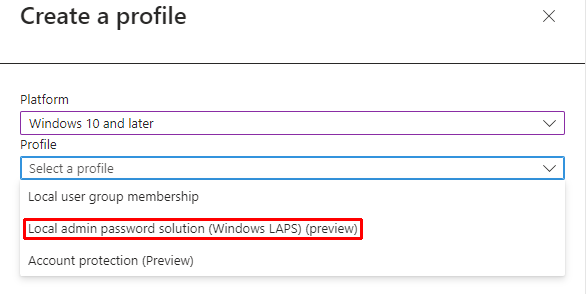
Platform: Windows 10 and Later
Profile: Local admin password solution (Windows LAPS) (preview)
- This allows LAPS to manage the password for our select account.
The next step will ask you to provide a name for your new policy, and a description if you wish. Next we'll get into the specifics of this profile.
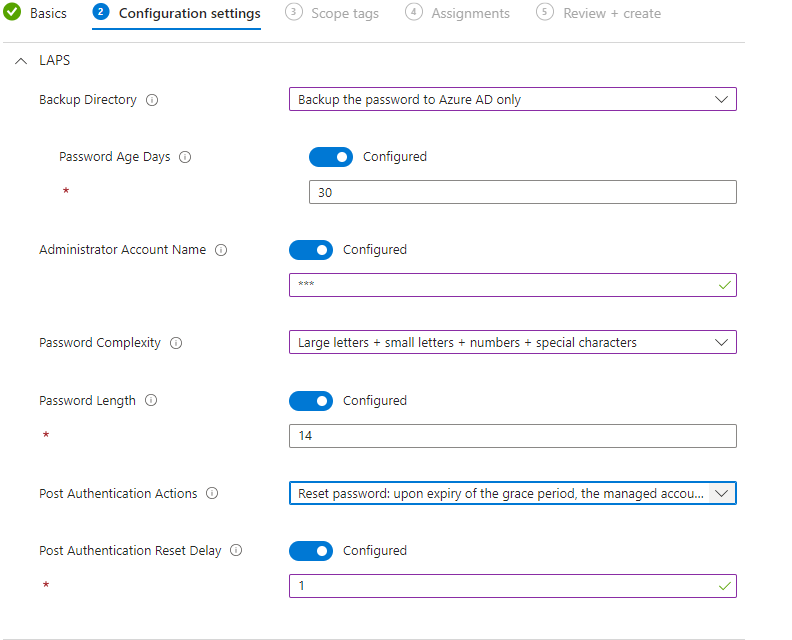
You have a lot of options here. All of these are subjective to your wants and needs. Let's break them down:
You can tab through the Tags settings as they are not required. Ensure you assign this policy to the correct Device or user then carry on.
You can assign this policy by going to intune.microsoft.com > Endpoint Security > Account Protection
Feel free to read and understand the next few settings and determine if you wish to change anything. In this case, we can simply create our new Policy once we've assigned it correctly.Here's where you find this amazing password. In your endpoint portal, go to Devices > Windows Choose your Windows System, then Local Admin Password. If you dont see anyhting here, you may not have assigned the policy correctly.