

There are several reasons to setup Intune for your organization. Intune can help with managing the devices your staff use everyday. It can also help secure those devices and make access to resources easier. Not to mention it can greatly reduce the workload of your IT department, and we all love a happy IT department we like coffee, bring coffee...☕
Getting Started | Create Intune Group | Assign a License | Setup Autopilot
Personally, im leveraging Intune to eliminate some recurring problems we're having. At my organization the computer skills of our users can be described as desolate - meaning they know how to press the button to power on the laptop, but thats about the extent of how comfortable they are working on a computer - to the dangerous. You know those people that are comfortble working on their computer, don't call very often, but know just enough to mess something up, then call you to fix what they were trying to do.
Before you start: Ensure you are familiar with the price of utilizing this online service. Licencing can add up quickly, especially in larger organizations due to requirements to run certain features. For example, an Office 365 E1 License will cost $10.50 per user. This will give each user access to Web versions of the office suite, e-mail, OneDrive and Sharepoint. For some this is certainly enough, but for those that utilise shared systems where 1 Office MAK key is needed, this cost may be prohibitive.
Let's start with Azure Active Directory (AAD), or depending on when you're readying this Entra ID. (for clarity, Microsoft has been warning of this name change for far longer than required). You'll need to have a 365 Tenant. This means your user accounts and domain information are located in Microsoft 365. If you already have an On-Premisis Active Directory Domain, you can use Microsoft Entra Cloud Sync.
Next thing you need is to ensure you have the right License. Luckily, I have a list for you:
Ok we're back. Now what to do with those tasty licenses. My suggestion is to assign them to a Security Group, then add the Users you wish to configure to that group. This way, you only have to make this assignment once, making this process much easier. Later, you'll see it's much easier to assign policies to 1 group, rather than several users or devices.
How do we do this. First, head over to https://portal.azure.com
Now find Azure Active Directory
Then Groups, then Click New Group
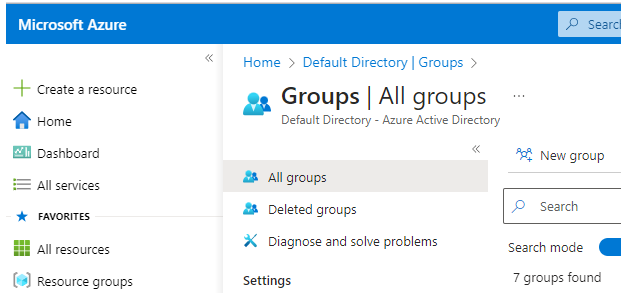
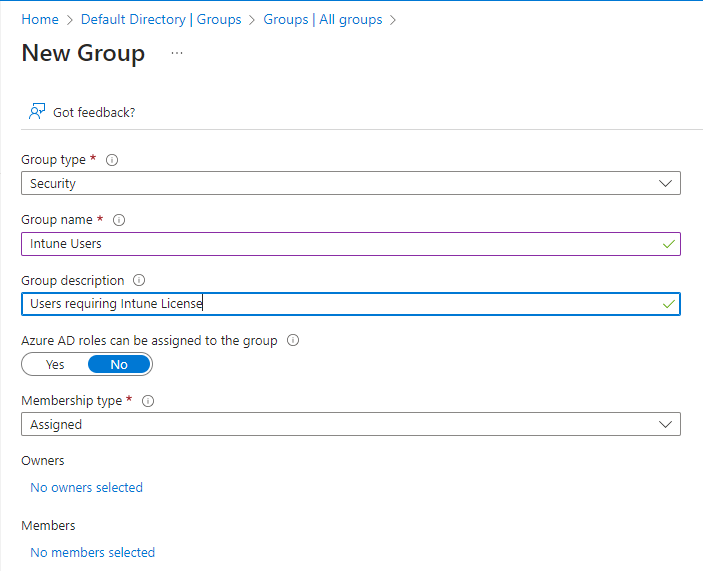
Once you've made your group, Find it and assign your license to the group
(Azure Active Directory -> Groups -> Licenses).
A good exercise to do now, is to go look at the users you've added to the group
and see what licenses they have. You'll notice users that are part of your Intune group have Inherited their license from the group. It's important to NOT assign
licenses to users and groups as thats a great way to waste licenses by having users with more than one assignment for the same license.

As you can see from the above image. The user has an Inherited license, AND the group the user is a member of (Inherited (Intune)), and a license that is directly assigned to the user (Direct, Inherited(Intune)).
This is a big no-no.
Having done this, what exactly does this allow you to do? For one, users can login and register to systems with their Azure AD account. We have configured the policies and best practices around that, but it is possible. Until you're ready to have this happen, I suggest not having any users in your Intune security group, aside from a user account to test with. That way nobody is affected by any changes you make to you're infrastructure.
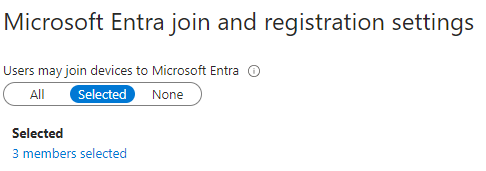
You can now add this group to be permitted to join. Do this by going to https://portal.azure.com -> Microsoft Entra ID -> Devices -> Device Settings.
Firstly, what is Microsoft Autopilot? Autopilot is a service which can:
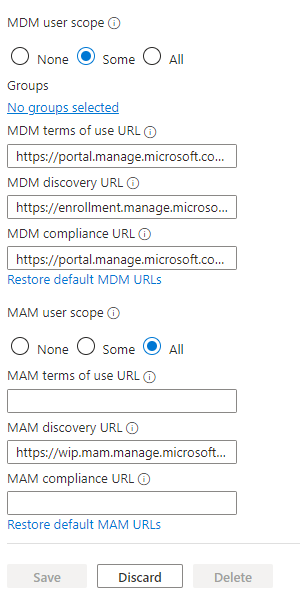
Head over to your Azure Portal - https://portal.azure.com - and find your Azure Active Directory. From there scroll way down and select Mobility (MDM and MAM). From there select Add Application then select Microsoft Intune
From there you'll be presented some options. The only thing you need to change here is who you are assigning this application to Do this by selecting No groups selected then selecing thr group you created in a previous step. The other options can remain
at their default unless you have something custom.
That wasn't too complicated now was it? Now it's time to make an Enrollment Profile.
You'll need to be in your Intune Admin Center - https://endpoint.microsoft.com then navigate to:
Devices -> Windows -> Windows Enrollment -> Automatic Enrollment
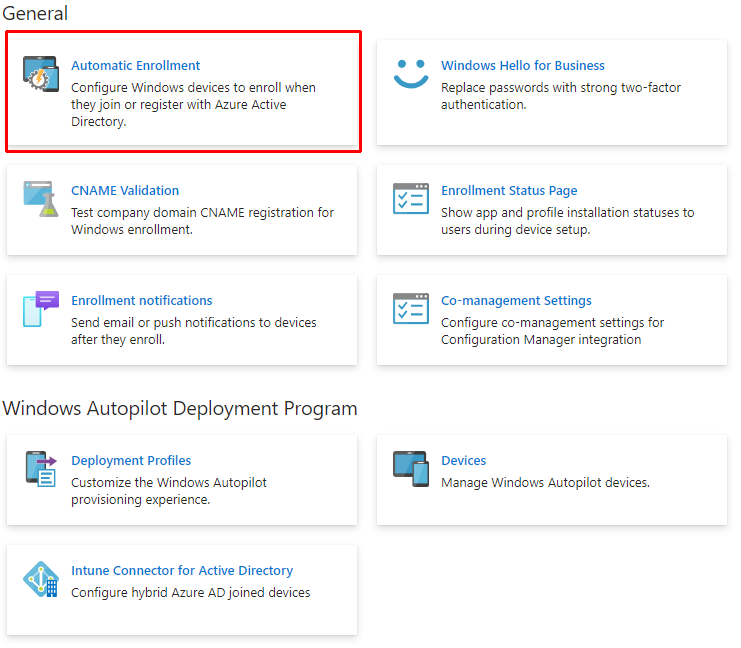
The next screen looks eerily like the first on this page. Ensure you select the correct groups to apply this user scope to.
Now under Windows Autopilot Deployment Program, select Deployment Profiles

From there, select Create Profile then Windows PC
Below are the settings I have configured:
Basics
|
Name |
Default Windows Enrollment Profile |
|
Description |
No Description |
|
Convert all targeted devices to Autopilot |
No |
|
Device Type |
Windows PC |
|
Deployment Mode |
User-Driven |
|
Join to Microsoft Entra ID as |
Microsoft Entra Joined |
|
Language Region |
Select your appropriate region |
|
Automatically configure keyboard |
Yes |
|
Microsoft Software License Terms |
Hide |
|
Privacy Settings |
Hide |
|
Hide change account options |
Hide |
|
User account type |
Standard |
|
Allow pre-provisioned deployment |
Yes |
|
Apply device name template |
Yes |
|
Enter a name |
Intune-%RAND:5% |
Assign this profile to the appropriate group(s)
Next we'll look at adding a Local Administrator to your Intune joined devices, and how to use LAPS to configure the password for this account.